My blog has been neglected… but I have to prioritize things
now that I’m a working mom. Needless to
say, I haven’t been able to craft like usual, but I haven’t gone completely
into hibernation!
For Mother’s Day, I decided to tackle the button-embellished
cards craft from “Martha Stewart’s Handmade Holiday Crafts.” It was another one of her crafts where she
has one picture and it’s not even of the completed project! It’s in progress, so I guess you just have to
imagine what the final product looks
like. Grrrrrrrr.
I have a ton of really cool buttons thanks to my husband’s
grandfather’s second wife (did you get that?), whose house we now live in. They’re all from the 50s and 60s and as it’s
been said before, things really were made better back then. The quality is incredible and the details are
so intricate (not to mention the vibrancy of the colors!).
I decided to make four cards… one for my mom (of course), my
mother-in-law, my sister, and my sister-in-law.
I didn’t quite anticipate the time it would take, so I may or may not
have been scrambling to finish them the night before Mother’s Day.
Here are the supplies that I used:
Here are the steps (in my own words):
- Cut a piece of card stock in your choice of size and color (but please make sure that it will fit in an envelope if you choose to use one).
- Cut another piece of card stock in a contrasting color, smaller than the other one. I used decorative scissors for a fancier look.
- Place your buttons how you would like them to appear on the card. I used three for each card, but in Martha’s example she uses six (or possibly seven because it’s not a final project, so we just don’t know!). Use a pencil and then trace dots where the stitched stems will be. It’s also helpful to use a needle to poke holes along the lines – though to be perfectly honest, I didn't do it because I didn’t read this until putting together this blog entry.
- Using embroidery floss, attach the buttons to the card. Then use green floss, embroidery floss that is, and stitch the stems using a running stitch.
- I used a micro-punch to make two little holes for the ribbon to tie the “bouquet” together. Then I threaded a small amount of ribbon and tied a bow.
- Use double-stick tape (or glue if that’s what you have) and attach the embroidered card to the larger card.
Some other things that I made…
I found this cool item on Pinterest
(surprise, right?) and it’s a booster chair for the kiddos using a vinyl
tablecloth!
I purchased two vinyl
tablecloths last year thinking that I would make bibs out of them, but decided
against it, so I had two cloths to choose from.
I wanted to test out the pattern first and see if I liked it before
cutting into the second tablecloth, but now that I’m done, I think I’m going to
make another!
Here are the instructions, and here are my
results:
\
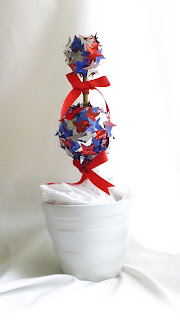
I also finally completed the 4th
of July Topiaries that I started on LAST YEAR.
It’s a tedious task… you cut off stars from a garland, then take
dressmaker pins and pin it around the topiary form. I love how it turned out, but good GOD did it
take a while. Of course it would have
been easier to do just one, but I have two for all of the major holidays, so I had
to do both…
 |
| Garland and some of the stars I cut off of it |
 |
| Dressmakers pins |
 |
| Close-up of topiary ball... yup, that's a whole lotta pins in there |


very impressed with all. You have MUCH more patience than I have.
ReplyDelete